
Make a Fabric Basketball for your Hoop It! Basketball Hoop
- Jessica Steele
- Nov 14, 2025
- 3 min read

Looking for the perfect finishing touch for your Hoop It! Quilted Basketball Hoop?

Make your own soft, fabric basketball to go with it!
This quick and easy sewing project is a fun way to use up fabric scraps and create a playful, handmade ball that’s safe for indoor play. With just a few materials and some basic stitching, you’ll have a mini basketball ready for action in no time.
Follow along for step-by-step instructions and you'll be ready to shoot hoops in the comfort of your own home in no time.
Materials Needed for your Fabric Basketball:
This free Fabric Basketball Template
Scissors and rotary cutter
Pins
(2) rectangles of different fabrics approx. 17"x 5"
Fiber Fill
Needle and thread to match your fabric for handsewing
Before Starting
All seam allowances are ¼" unless otherwise noted.
RST= Right Sides Together
WST= Wrong Sides Together
Preparation
Print your free fabric basketball template at 100% scale and using portrait orientation.
Check to make sure the 1 inch square measures 1 inch. Adjust print settings if necessary.
Cut out the fabric basketball template.

Place the template on your fabric pieces with the grain of the fabric aligning with the grain line on the template.
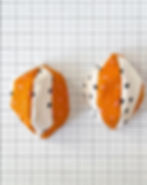
Cut (8) total fabric pieces using the template, (4) from each 17" x 5" rectangle of fabric.


Ball Assembly
Place (1) Color 1 piece and (1) Color 2 piece RST and sew along one side of the curve backstitching at the beginning and end. Start your stitching at the very end of the pieces.
Open the unit and pin (1) Color 1 piece to the right side making sure the seam is fingerpressed toward the original Color 1 piece. Sew the Color 1 piece to the previous unit.
Repeat step 2 using (1) Color 2 piece so that (4) pieces are sewn together. The seams should all be facing the same direction.
Repeat steps 1-4 to make another set of (4) template pieces sewn together for a total of (2) half-units.
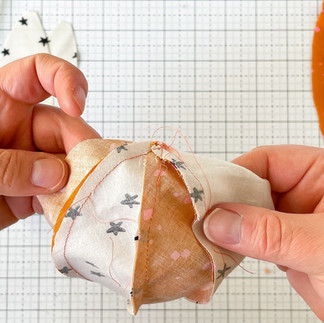
Pin the two half-units RST, matching seams at both ends and sew the pieces together leaving a 2" gap open for turning right side out. Backstitch at both ends of the 2" gap to secure.
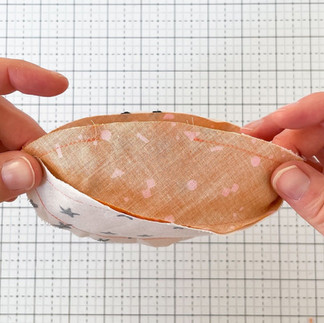
Turn the ball right side out and press the opening to make a crease where the ¼"seam will be hand stitched to close the ball.
Fill the ball with fiber fill

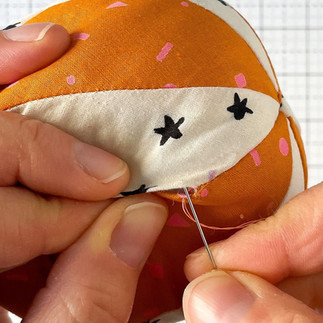
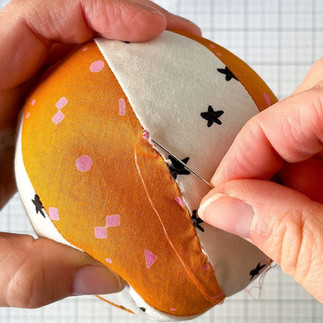
Utilizing a blind/ladder stitch, hand stitch the opening closed.


Blind/Ladder Stitching
Thread your needle with your matching thread and tie both ends in a knot.

Take the needle under the end of one side of the opening and bring the knot up all the way to meet the underside of the fabric.

Tuck the knot down under the opening and out of the way.

Take the needle across the opening to the other edge and bring it through the crease of the edge. Take the needle up the same side and come out through the top.

Take the needle across the opening to the other side and bring it through the crease. Take the needles up the same side and come out through the top.
Repeat until the entire opening is stitched. You’ll notice it will start to look like a ladder in between the edges of the opening.
Once the opening is stitched, pull the opening closed.

Take the needle through the end of the opening and back up creating a loop. Take the needle through the loop to create a knot. Repeat to create a double knot.
Take the needle back down through the knot and out at any point on the ball. Pull the knot down into the seam and trim off the excess thread.


Now you're ready to hoop it up with the Hoop It! Quilted Basketball Hoop.


I love how quickly this project comes together and how customizable it is with different fabric colors and textures. It’s such a fun complement to the Hoop It! Quilted Basketball Hoop, and it makes a great gift for the basketball fan or playful addition to your sewing room or playroom.

I’d love to see your version, so be sure to share your finished fabric basketballs and tag me @jessicasteeledesign when you do!